A couple of screws need to be left out on the base, as I made a mistake, but it dose not affect things.
I will point out this error when I do the assembly instructions.
When cleaning up this peace, take care not to remove the two little dimples that sit on the screw of the stepper motor. Obviously they won't be as sharp as shown in the sketch, so I have tried to take a photo of what mine looks like.
Z Axis: File: Z_Axis.stl
Take care again when cleaning the bit that sits on the Motor Screw.
For this project, I wanted to make a compact portable plotter using 2 motors
from CD/DVD Drives.
I wanted to give it some memory where it can store some plots, and have a menu
system to set some basic settings and be able to chose plots stored in memory.
I use
FreeCAD 0.18 to
design my 3D Prints, and
KiCad 5.0.2 to design
my PCB.
Both these programs can integrate with each other. They are open source and I
recommend them.
I have started to make projects using modules, and where possible use modules
available on the internet, and make a motherboard to plug the modules together.
this way some things can be repurposed for another project if needed.
For a list of the purchased modules for this project look here:
Module List
For a list of 3D Printed Parts (PLA) look here:
Printed Parts.
Motor Shield Modification:
The motor shields are a breakout boards for the L293D (dual Half-bridge driver)
with a 78M05. (5 volt regulator)
I don't want to use them as they are, I'm going to modify them. (it was cheaper
this way than making my own)
Here is a sketch showing them in place. (they end up under the board I will
make):
The main modification to the shields, is the removal of the 5 volt regulator,
care needs to be taken when removing these as they will be used later.
The reason for removing them is: I want to wire them in a different
configuration.
I will be using them to control the amperage as well as the voltage.
Here is a photo of one I have modified, I have highlighted areas I have
changed:
If you are not making it to fit my printed plotter then as I say earlier, only
the voltage regulator needs to be removed. I have modified other parts to make
it fit easier.
Depending on how the motherboard is made, the row of 8 pins could be a row of
sockets.
Which ever, when the motherboard is fitted over these drivers, there is matching
pins or socket that connect together.
Also the motherboard covers one of the drivers completely, so on one of the
driver boards, the row of 4 pins to the stepper motor needs to be a horizontal
set. (see sketch showing them fitted above)
I will be making a motherboard to fit over the top of these and hold the Arduino
NANO that will be controlling them. (I will also add other things for future)
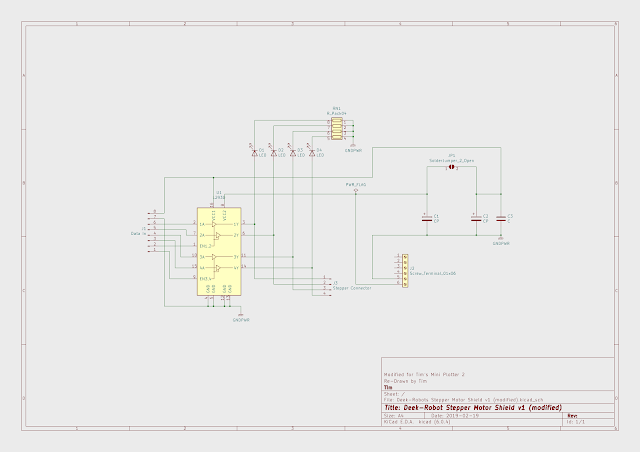
The original Driver Shield was wired up like this:
You can see that the L7805 is wired to just regulate the voltage.
After the modification it will be something like this:
The stepper motors I am using for this project are motors I repurposed from
some CD/DVD drives.
The only data I could find for these type of motors was from a data sheet for a
PL15S-020. (I will assume other makes are similar)
If we do a little maths: V=ri, 5 volt divided by 10 ohms = 0.5 Amps
As I could check the resistance of my motors and found them to have 12 ohm
resistance.
I will work on the assumption mine require 0.4A. (5/12=0.42A)
They probably are designed to take 0.5A, but: they are normally mounted to a
large metal frame that acts like a massive heat sink.
My steppers are going to be mounted to plastic. (PLA)
Knowing this I will be wiring the Voltage regulators in the Constant Current
configuration.
(see 78M05's in circuit below)
The resistors used will need to be 12.5 ohm 2 Watt.
(load = regulator voltage / resistor) R=5/0.4=12.5, (W=Vi) 5x0.4=2
This is the circuit of the Motherboard I will be making:
I have added the L7805 to power the servo or a laser I hope to add at a later
date.
The L7805 is a little under powered for the servo, one day I want to come up
with a better way of controlling the pen.
A Rendered 3D sketch (this sketch may change as I find better
configurations):
You can see from the sketch above I use the two voltage regulators taken from
the driver boards. These will get hot,I haven't fitted heatsinks. The board I
designed here is double sided and has copper fill on the underside to help
dissipate the heat, a heat sink could be fitted under, but it is not
required.
The Voltage Regulators removed from the Driver Boards are 78M05 which are 500mA
devices, with max. operating temperature 125 deg. C.
As we are setting them at 400mA (close to max.) I do not recommend touching
them when in use.
But wiring the power to the stepper motors in this way means that the regulator
gets hot (which they are designed to do) and the stepper motors don't.
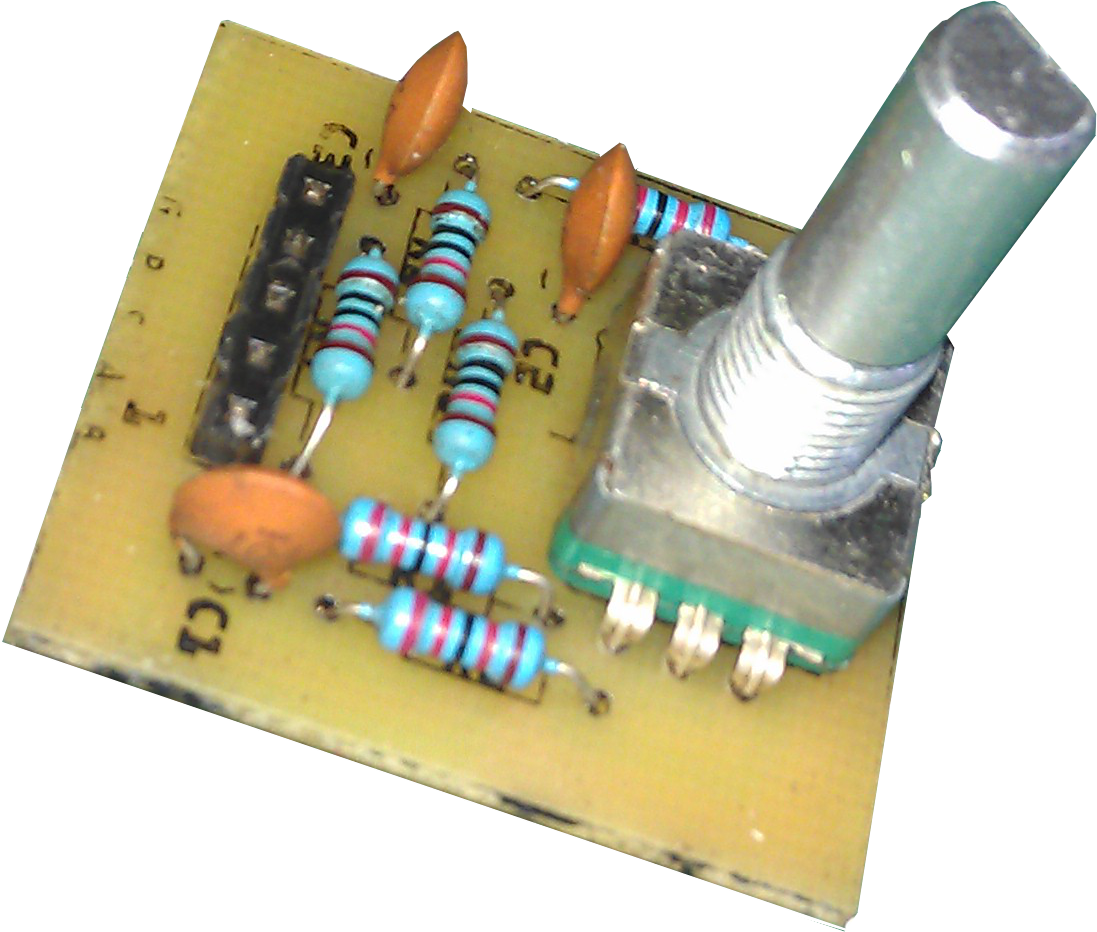
A Rotary Encoder bought of the web could be used as is, but this project uses
all the memory on the Arduino NANO due to the menu. (menus use a lot of text
)
The modules on the web vary slightly, (made as cheep as possible) some don't
have pullup resistors on all the switch pins. They defiantly don't have any
de-bounce circuitry.
Code can be used for the de-bounce and internal pull up resistors could be set,
but as I say, memory is a premium on this project.
So I make my own board with pullup resistors on all switch pins and because I
have put interrupts on all three, all have a resistor/capacitor de-bounce.
I have made a single board to house the three AT24C256 memory IC's.
I haven't made it with jumpers for the addresses of each IC, I set the addresses
in the PCB Circuit. (50, 51 and 52)
I used a stackable header socket so that it fits between the motherboard and the
OLED Screen.
I only have 2 memory IC's at the moment, but on these two have managed to fit 18
plots on them.
I can now plot the following without it plugged into my computer.
All I need is to add power from my little power pack I made.
Recommend 9v. (lowest it will run at is 7.5v)
At standstill draws 90mA.
Drawing draws 650mA.
Servo movement peaks at 800mA.
With 12v. (Max, don't recommend going higher)
At standstill draws 100mA.
Drawing draws 900mA.
Servo movement peaks over 1A. (If the plot has a lot of servo movement, the
L7805 will get hot)
I have ordered some more memory IC's, when I get them I am going to write some
code to make the plot files smaller, to enable more to be saved to the
memory.
Also I want to add the alphabet.
Also thinking of making a laser attachment, that's why I put a MOSFET in the
circuit.
A closeup of the boards fitted:
Added some ASCII Characters to the memory.
I also designed it to take a laser.
I am still doing my blog on my main XY Plotter atm, so I will post details
when I get time or if some one takes interest in it.
(if anyone wants to make it and would like the stl files, just ask)
 File: Y Axis_P1.stl
 File: Y Axis_P2.stl
 File: X_Axis.stl


 File: Z_Axis.stl
 File: Tool_Holder.stl
 File: Pen_Holder.stl
 File: Pen_Holder_Screw.stl
 File: Knob.stl